Order block vs breaker block vs mitigation block: does the sweep matter?
One candle, three outcomes: an order block holds, fails after a liquidity sweep or fails without one. What separates them, and whether the sweep matters in our data.
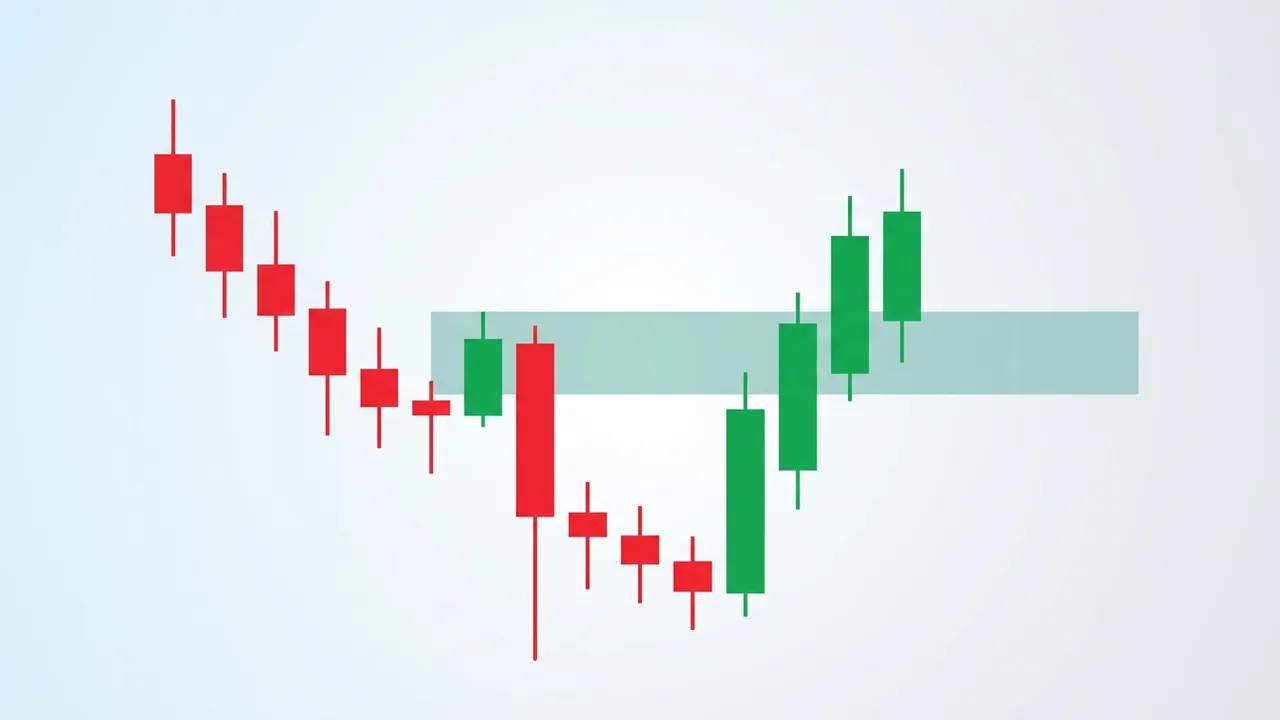
The three names describe the same candle at different points in its life. An order block is a zone that has not failed yet. Breaker and mitigation blocks are order blocks that did fail, and only one thing separates those two: whether price swept the previous high or low before it broke through. Below is what each one is, a real example, the word "mitigation" untangled, and what five years of our own hourly forex data say about the sweep.
Each one in one sentence
| Term | What it is | What has to happen | What traders expect on the return |
|---|---|---|---|
| Order block | The last opposing candle before an impulse | The impulse breaks market structure | A reaction in the direction of the impulse |
| Breaker block | An order block that failed after a liquidity sweep | The next swing runs past the previous extreme, then price closes back through the block's swing | The opposite reaction: the old resistance acts as support, or the reverse |
| Mitigation block | An order block that failed without a sweep | The next swing falls short of the previous extreme, then price closes back through the block's swing | The same role flip as the breaker |
One candle, three outcomes
Take the bullish case. Price makes a swing low (call it A), rallies to a swing high (B) and turns down. The last up-close candle before that drop is a bearish order block: in the Smart Money Concepts (SMC) framework, the place sellers are supposed to have stepped in.
From there, three things can happen:
- The drop keeps going. The order block did its job, and a return to it is read as a place to sell again.
- The drop runs below A, then price turns and closes above B. The fall took out the stops resting under A, a liquidity sweep, and then the move it started failed. The bearish block is now a bullish breaker: old resistance, expected to act as support.
- The drop stops above A, then price closes above B. Same failure, but without the sweep. In the vocabulary of ICT (Inner Circle Trader), the sellers' push fell short in a "failure swing". The block is now a bullish mitigation block.
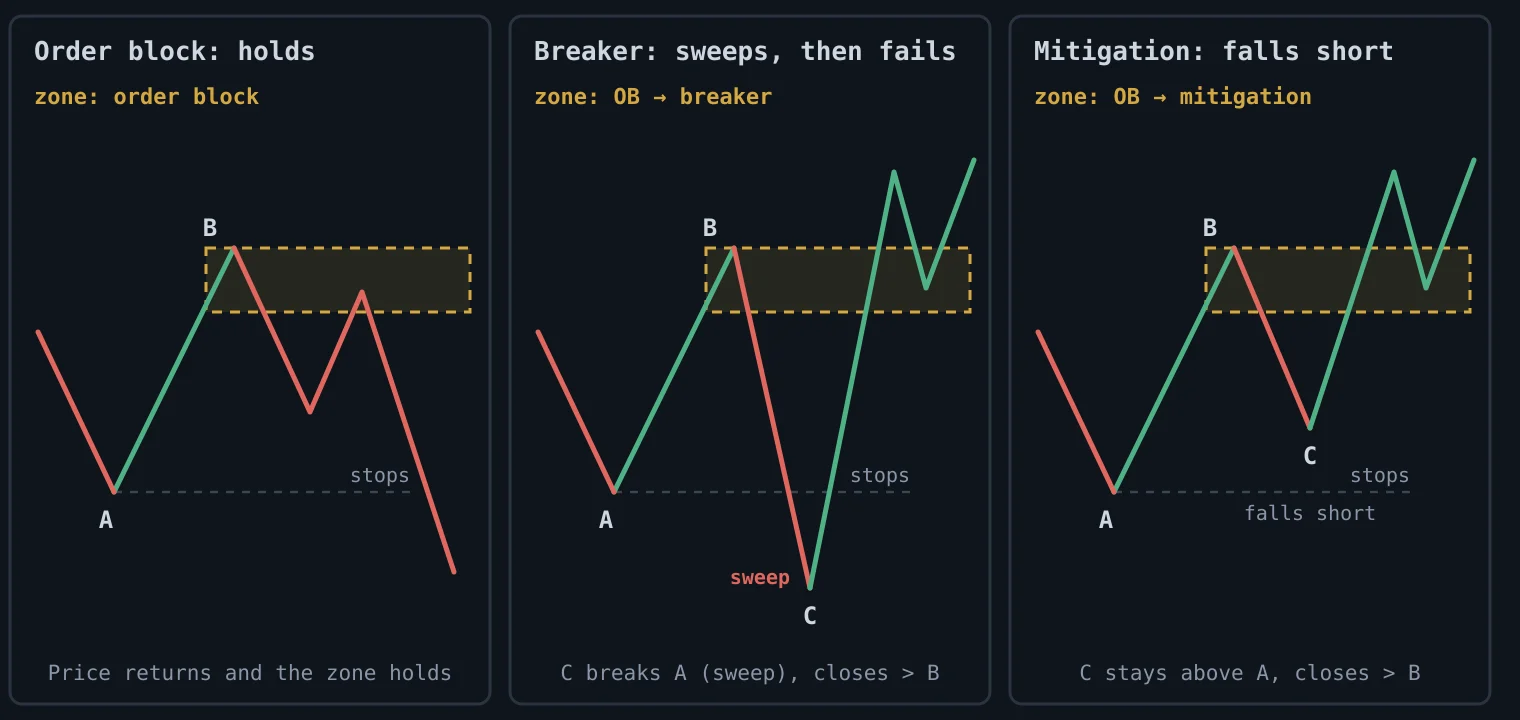
The candle never changes. As Alpha Ex Capital's guide to the mitigation block puts it, the same candle can be an order block, a mitigation block or a breaker, and the label comes from what happened next. The bearish versions are the mirror image.
The detail the sources disagree on
Even the candle that marks the zone is not settled. Alpha Ex Capital and BrokerXplorer's guide to breaker and mitigation blocks keep the original order block: the opposing candle at the swing that later breaks. LuxAlgo's page on the breaker block and the TradingView tutorial quoted below mark candles from the failed leg instead, the ones that made the sweep.
That is not a quibble: they are different candles at different prices. In the EUR/USD example below, one is the last up-close candle at the swing high, the other the last down-close candle of the drop below the swing low. We measured both.
A real one: EUR/USD in November 2025
This one comes from our own hourly data on EUR/USD:
- 10 November. Price makes a swing low at 1.15540 and rallies to a swing high at 1.15782. The last up-close candle before the turn runs from 1.15625 to 1.15758: a bearish order block.
- Same day. Price falls to 1.15408, 13.2 pips below the swing low. That is the sweep.
- 11 November. An hourly candle closes at 1.16006, above the 1.15782 high. The bearish block has failed, and it is now a bullish breaker.
- 12 November. Price comes back into the zone in the early hours, trades as low as 1.15698, bounces to 1.15886, then returns to 1.15627, two-tenths of a pip above the bottom of the zone, and closes back inside. Later that day it reaches 1.15981, and 1.16350 by the next morning.
Had the fall stopped above 1.15540, the same candle would have been a mitigation block, and nothing else on the chart would have changed. We picked this example because it shows the sequence cleanly, not because it worked: in our data, about four in ten breakers that price returns to fail.
The word "mitigation" means two things
This is where most of the confusion starts.
- "Mitigated" as a state. An order block is mitigated once price has returned to it; under the framework's logic its orders are filled and the zone is spent. That is how our order block guide and our comparison of order blocks, supply and demand zones and support and resistance use the word.
- "Mitigation block" as a pattern. The failed order block without a sweep, described above. The story behind the name: in the bullish case, traders who sold the failed swing are trapped when structure breaks, and they buy when price returns to their entry, to get out near break-even. They are mitigating a loss.
The two meanings are unrelated, and the second is a story. LuxAlgo's page on the mitigation block calls it plausible rather than observable. Our own mitigation block explainer used to describe the pattern as little more than another name for an order block; we have corrected it alongside this post.
Does the sweep make the breaker stronger?
Some ICT tutorials say yes. An ICT tutorial published on TradingView says that "a Breaker is always a higher probability PD Array to trade off from", PD array being ICT's name for a zone worth trading from. The reasoning: a breaker has already cleared the stops beyond the extreme, so the move has fuel. Alpha Ex Capital notes that no peer-reviewed study publishes a win rate for the mitigation block.
So we tested it. We found every failed order block on five years of hourly data for ten pairs, sorted them by whether the failed swing had swept the previous extreme, and checked what happened when price came back. A zone held if price moved one ATR (average true range) away from it before any candle closed through its far side.
As with the fair value gaps (FVGs) we measured, hold rates mean little on their own, so each zone was compared with ten controls: bands of the same width at the same distance from price, taken at random hours nearby with similar volatility.
| Failed block (hourly chart) | Found | Median width | Price came back within 120 candles | Held, once price came back | Control at the same distance |
|---|---|---|---|---|---|
| Breaker (swept the extreme) | 10,393 | 12.4 pips | 92.0% | 59.7% | 60.5% |
| Mitigation (fell short of it) | 13,642 | 14.2 pips | 91.9% | 62.2% | 63.5% |
The differences below are worked out from the unrounded rates, so they can be a tenth away from what the rounded figures in the table give: the breaker, for example, held 59.68% of the time against 60.54% for its control.
Taken raw, the breaker holds less often than the mitigation block, by 2.5 points (95% confidence interval: 1.3 to 3.8 points). That is the opposite of the claim, but it is not a finding about the sweep either. Its control holds 2.9 points less as well, because breaker zones have a different geometry, starting with their width: they are narrower, and a narrow zone is easier to close through.
Compared with its own control, the breaker comes out 0.4 points ahead of the mitigation block, with a confidence interval from 0.9 points behind to 1.8 ahead. We repeated the test with wider swings, a target of two ATRs and a second way of building the controls: the difference stayed between 0.8 points behind and 0.7 ahead, and never cleared zero. The sweep made no measurable difference, and none of the intervals allowed one of more than 2.5 points either way.
Neither zone beat an ordinary band of the same size either: 0.9 points below its control for the breaker, 1.3 for the mitigation block. A placebo, a random candle from the rally before the swing high, landed between 0.9 points below and 2.1 above its controls across all the runs; the real zones landed between 0.4 and 1.6 below theirs. Our implementation of LuxAlgo's definition of the breaker, with the zone on the last down-close candle of the sweep, gave the same verdict: 64.0% held against 64.9% for its control.
Breakers made up 43% of the failed blocks: 10,393 of 24,035.
How we measured it
- Data: the same hourly (H1) candles as in our FVG measurement: ten forex pairs, January 2021 to April 2026, 329,283 candles from a MetaTrader 5 broker's history in the broker's server time. The analysis was run on 7 October 2026; the code and random seeds are available on request.
- Swings: a swing high is a candle whose high is above the three candles on each side, and a swing low the reverse. We kept them alternating, high-low-high, and repeated everything with five candles on each side.
- Breaker or mitigation: after a swing low A, a swing high B and a swing low C, the first candle that closes above B. If C is below A, the failed block is a breaker; if not, a mitigation block. Bearish cases are the mirror image. Each event is dated at that close, or three candles after C if that comes later, because only then is C confirmed as a swing; no later price is used.
- Zone: the full range, high to low, of the last opposing candle at or before B. That is the wider of the two readings in our order block guide.
- Held: price touches the zone within 120 candles, then moves one ATR beyond its near edge before any candle closes beyond its far edge, within 48 candles. We also tried two ATRs.
- Controls: for each zone, ten random candles within 500 on the same pair, each with an ATR within 10% of the zone's own, with width and distance scaled by the ATR ratio. One design keeps the zone's distance from the close; the other places the band right under the control candle's low (above its high in the bearish case). The confidence intervals come from resampling whole pair-months.
What this does not measure: whether trading these zones makes money. Holding by one ATR is not a trade. Spread, entry, stop and the swings a trader would ignore on a higher timeframe all decide that, and it would need a proper backtest, which this is not. Our swing rule is mechanical, and a discretionary trader marks fewer, cleaner swings.
What changes in practice
- Name the outcome, not the candle. It is an order block until it fails. After that it is a breaker if the failed swing swept the extreme, and a mitigation block if it fell short.
- Do not rank the breaker above the mitigation block because of the sweep. In our data, once the zone's geometry is matched, the sweep changed nothing.
- A failed block is not a stronger block. Neither held better than an ordinary band of the same size at the same distance.
- Keep "mitigated" and "mitigation block" apart. The first is a state of any order block, the second a pattern.
- Structure still comes first. As our review of what SMC can and cannot claim argues, the reason to act has to come from structure and from your plan, not from the name of the rectangle.
The takeaway
An order block, a breaker block and a mitigation block are one candle with three possible histories: the zone held, failed after a sweep, or failed without one. The sweep is what the vocabulary is built around, and on five years of hourly forex data it did not change how often the zone held. Learn the names so you can read other people's charts, but do not expect one of them to work better because of what it is called.